16th of December - First day of repairs.
Well, yesterday I gave the car a good wash. After her journey from the states and then up from Southampton there was quite a bit of black dust and dirt on the car. Plus it gave me a great chance to check her out again. After a problem starting her due to a flat(ish) battery (more of that later) I managed to carefully get her out of the garage. One slightly brown pant moment when she stalled on the slope out of my garage and I discovered that the handbrake was slipping! Wonderful! Not easy to start a manual car, on a slope with a slipping handbrake. Think about it!
But, today is another day and she came out without too much stress. Maybe I'm just getting used to her and that high biting point clutch. Now to try that list of niggles.
The fuel smell seems to have vanished, so maybe it was just the overspill at the petrol station. Following the initial start where she gave out a little white smoke (it's cold and to be expected considering her age) she ran very clean. Good to know the fans are kicking in without a problem at 150 degrees. Fingers crossed that's sorted. Love it when a problem just vanishes.
The dead pedal had fallen off shortly after leaving Southampton. Simple fix on close inspection. Two bolts hold the pedal in place and after first removing, checking and reinserting the rubber pad it was quick to screw back in place. Sorted!
Now, that stereo. Again, this was fairly easy. Rather than just jump in and start ripping things out I decided to first check the connections on the speakers, clean them up and re-insert. Then I checked the connections on the stereo itself. After reseating a couple the four speakers sprang into life. Not the best sound system in the world, but it works! Nothing like music while you work as well.
 Now for something a little more challenging. That brake light issue. Now, my first thought was that it must be the master cylinder being low on DOT4 fluid. The cylinder can be accessed from the luggage compartment below a rubber bung. To get full access (and to review the condition of the cylinder) I decided to remove the access hatch, held in with a series of black screws. Now, some of these looked original, some looked to be more self tapping screws rather than bolts. All had less than perfect heads on them. One had obviously been stripped and the previous owner had (part) drilled it out. I'll be replacing these at some point.
 The master cylinder has a filling screw top with a sensor connected at the top. The reservoir was full to the max, so no leaks ( good news all round). So why the brake light on the dash? Well, on unplugging the sensor connection the fault became obvious. The socket was full of silicone grease. Grease = no closed circuit, which in turn means a warning light. A quick clean and all seemed well again. Another one down.

Next was the cigarette lighter. On the way home the lighter socket refused to work. A real pain as my sat nav has a duff battery which did well to last us half the journey. It was present for all the major stuff, but I'll be needing that socket to work later. Pulling the lighter itself out revealed a messy and corroded barrel, especially on the inside at the bottom where the lighter (or any other adaptor) made contact. Some WD40 and a good clean with an abrasive cloth later the bare metal showed through once more. Sure enough once reconnected to the cables in the console power was present. I know because it sparked across the gap when I tried to pull out the lighter with a pair of pliers, not to mention the lighter started to heat up and produce white smoke. That'll be the WD40.

Anyway, this fix done it suddenly hit me that this could have been the cause of the battery running down so quick. Following it not working we had inserted back into the socket the lighter, which then had been making contact with the pins in the base. Now, the pins being that corroded meant that not enough current was present to heat the lighter and therefore have it pop out of the holder, but enough current was getting through to both heat the lighter a small amount, plus drain the battery. Problem solved (I hope). I'm just glad the lighter didn't get any hotter!
The mirrors again proved to be easy. I'd read online that some of the connections can become dislodged. So, to access these simply use a screwdriver to pop out the housing and check the connections. Well, no matter what it refused to move. Just as I was about to give up I knocked the adjustment joystick and the mirrors moved up on the passenger side. Not a perfect slip, and considering I'd done so little probably not a permanent one either. But it has allowed me to move the mirror into a good position on that side at any rate. Job half done, and one to return to.

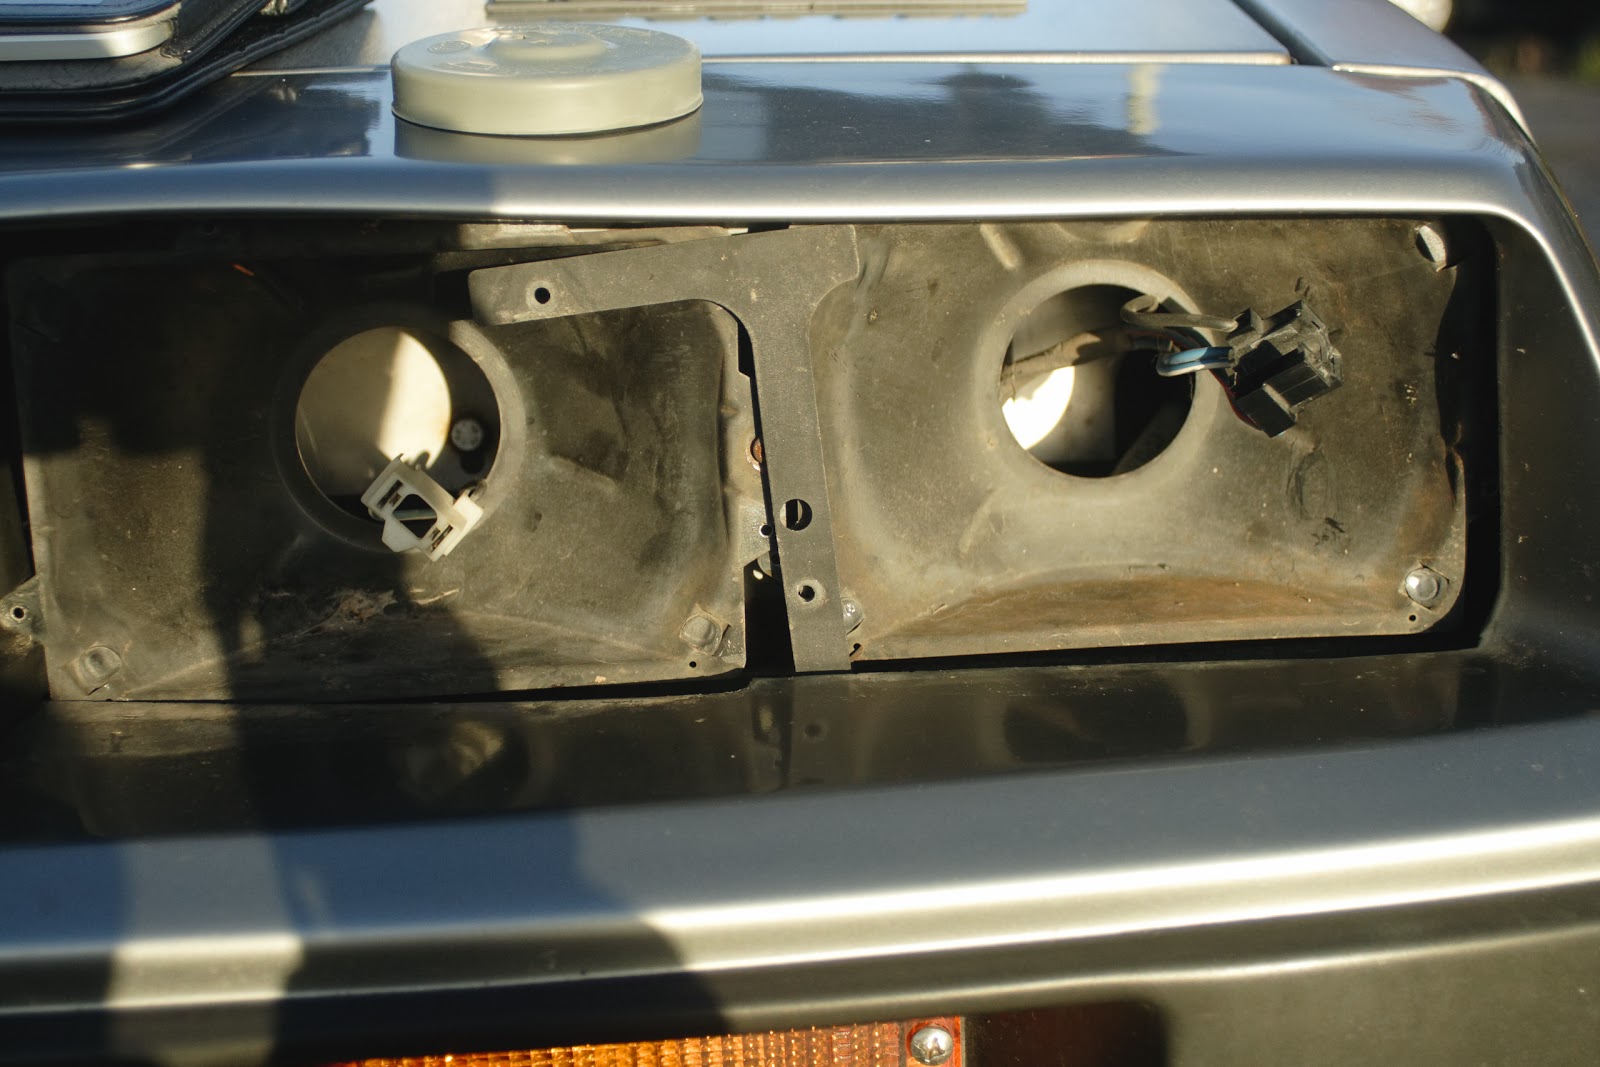
I also managed to remove the original US lights, ready for the UK spec Hella units to go in. Some of the screws are a little fiddly and need the patience of a saint to remove. Plus they are sometimes behind the front fascia plastic, so a magnetic, thin screwdriver is a must. Be careful with them as well as they are small and easily lost. Try doing it as I did on the road, in December with a covering of water and muck on the road. Nice!
Once out you can see that the buckets for the lights will need a hole drilling in them to allow for the sidelight. On the Hella units this sticks out at the back, unlike the sealed units on the originals. Veleo versions of the lights are available and are pretty much a straight switch. They even have an adaptor for the connection to the H4 bulb, which mine don't. But at the time of writing these are rarer than rocking horse poo to get hold of, so the Hella units are the best fit for now.

Now, originally the inner lights performed the side light function, and the over ones the full and dipped beam. I've opted to change all four units, although technically you only need to change the outer lights for the UK MOT. However, the inner ones being sealed units there will be a time when the bulb goes and I'll need to change them. Plus they won't match the more modern looking outer. Therefore I'm changing all four. As all four units can hold a H4 bulb I'm going to wire them up so that full and dipped beam work on all four. Should help with them lighting up the road. As for the amount of amps drawn on the circuit on high or low beam, I'm not sure. I'll have to check this out and see. Watch this space. In the meantime the lights are out and ready for the buckets to be drilled or cut to allow for the side lights. Another job half done anyway.

With that all done I just checked out the relay and fuse box of the car. It all looks to be in order, and many of the key updates have been done, such as the fan fix which makes sure the fans come on correctly and without melting the fuse box. All looks good.
Now the final touch was to reinstate the original gear shift knob I cleaned up and restored even before the car got into the UK. The stainless steel one on the car from the previous owner is really nice, and I'll be keeping it. Its one hell of a weighty bit of metal, embossed with the DMC logo. Very nice, but somehow I wanted the original to be put back where it belonged. I never thought I'd say that. The originals always looked a little rough to me, but my refurbished shifter knob looks great back in its rightful place.
With that it was time to put her back in the garage, front first this time. This proved to be a lot easier than going in back first, plus it had the added advantage of allowing the drivers door to open fully. Yah! Oh, one word of advise, never get cheap silicone spray near yo windscreen, especially when its getting dark and your DeLorean is without lights. Nightmare to get the stuff off, and a bugger to see through in the dim light.


No comments:
Post a Comment